Installing Solar Panels on a Cabin Roof: Mounting, Sealing & Best Roof Types
Affiliate disclosure: This page contains paid links to Amazon and eBay. If you buy through them, we may earn a commission at no extra cost to you. As an Amazon Associate I earn from qualifying purchases.
Mounting panels is the most physical part of a cabin solar build — and the part where a shortcut costs the most, because the failure mode isn't lost watts, it's a leaking roof. The good news: cabin arrays are small, the hardware is mature, and a careful owner with basic tools can do a professional-grade install in a weekend.
This guide covers which roof types take solar best, the right mounting hardware for each, how to seal penetrations so they outlast the shingles, and the orientation and tilt decisions that determine your harvest.
What Roof Is Best for Solar Panels?
Ranked from most to least solar-friendly:
- Standing-seam metal — the best. Clamp-on mounts (S-5 style) grip the seams with zero penetrations, install fast, and the roof itself outlives the panels. If you're building or re-roofing a cabin with solar in mind, this is the answer.
- Corrugated / ribbed metal — very good. Requires screws, but purpose-made brackets with EPDM-backed hardware seal reliably into the rib tops, and the roof's lifespan matches the array's.
- Asphalt shingle — fine, the standard case. Lag-bolted mounts into rafters with proper flashing are a solved problem. The only caveat is age: don't mount a 25-year array on shingles with 5 years left. Re-roof first.
- Metal over purlins (common on log cabins) — good with care. Anchor into purlins or rafters, never sheet metal alone, and account for the seasonal movement of log structures with generous sealing.
- Wood shake, tile, rolled roofing — difficult. Brittle, irregular, or short-lived surfaces. On these cabins, a ground mount is almost always the better call.
Beyond material: the roof face should point within ~45° of true south, clear the tree line, and have sound structure. An array runs 15–20 lbs per 100W panel including rails — light by roof standards, but worth a look at old hand-framed cabins.
Orientation and Tilt
Azimuth: true south (not magnetic — check your local declination) maximizes daily harvest in the northern hemisphere. East or west faces cost roughly 15–20%; workable, not ideal.
Tilt: latitude is the year-round compromise. Add 10–15° for winter bias — a steeper array catches the low winter sun and sheds snow — or subtract for summer-only cabins. Most owners simply install at the roof's existing pitch and accept the small penalty; the arithmetic rarely justifies tilt-up racking on a pitched roof.
Mounting Hardware by Roof Type
| Roof | Hardware | Penetrations |
|---|---|---|
| Standing-seam metal | Seam clamps + rail or mini-rail | None |
| Corrugated metal | Rib-top brackets, EPDM-sealed screws | Sealed screws |
| Asphalt shingle | Flashed L-feet / mounts, lagged to rafters | Flashed lags |
| Metal over purlins | Brackets lagged into purlins | Sealed lags into structure |
Renogy Solar Panel Mounting Z-Brackets (4 sets)
The simple, proven mount for one-to-four-panel cabin arrays: aluminum Z-brackets that bolt to the panel frame and lag to the roof structure. Pair with quality sealant and stainless hardware and they'll outlast the shingles under them.
Adjustable Tilt Solar Mount Rack
Adjustable-leg racking that sets your own tilt angle on flat or low-pitch roofs — and lets four-season cabins steepen the array each fall for winter sun and snow shedding. Set it twice a year and forget it.
Sealing Penetrations: The Part That Matters in Ten Years
- Hit structure. Every lag goes into a rafter or purlin — locate them, mark them, drill pilots. Sheet decking alone will not hold an array in wind.
- Flash, don't just goop. On shingles, use flashed mounts that tuck under the course above; sealant is the backup, not the system.
- Use butyl or roofing-grade sealant under brackets and in pilot holes on metal roofs — not general-purpose silicone, which fails in UV and thermal cycling.
- Drip loops on every cable entering the building, through a weatherproof gland or junction box, positioned so water runs away from the penetration.
- Torque, then re-check after a season. Roofs move; one autumn re-torque catches anything that settled.
When a Ground Mount Beats the Roof
Choose a ground mount when the roof is shaded, faces the wrong way, is structurally uncertain, or wears a fragile surface — and consider one anyway in snow country, where sweeping a ground array takes thirty seconds and a roof array takes a ladder. The costs are a simple timber or pipe rack and a longer cable run, which higher string voltage makes nearly free. Wiring from either mount into the cabin is covered in the wiring guide, and full system assembly in the setup guide.
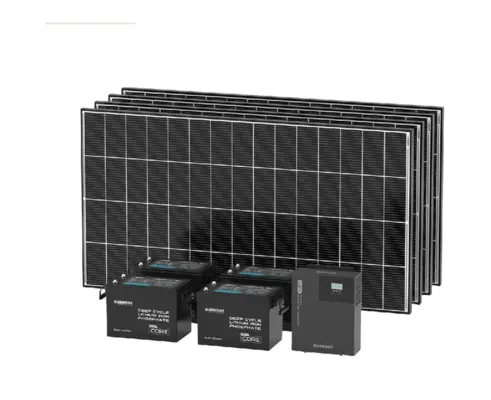 Renogy Cabin Solution — Complete Off-Grid Solar Kit →
The Install Day Sequence
A clean roof install follows a rhythm that keeps mistakes on the ground where they're cheap. Stage everything first: panels leaning at the eave, rails assembled, brackets counted, sealant and driver on the belt. Locate and mark structure from below where possible (rafter positions telegraph through at the eaves and ridge), then confirm from above with pilot holes. Mount the attachment points first and pressure-test your sealing detail on the first one — one perfect bracket teaches the pattern for the rest. Rails next, squared and torqued. Panels last, and here's the trick that saves the day: connect each panel's cables before setting it into position, because connectors are trivially reachable on a tilted panel and miserable under a flat-mounted one. Work panels in pairs with a helper, clamp progressively, and leave the array's home-run cables neatly secured with UV-rated clips — draped cable is the detail that separates a professional-looking install from a science fair.
Wind, Load Paths, and Sleeping Well in Storms
Wind, not weight, is what tests a cabin array. Uplift on a panel in a gust concentrates at the attachment points, which is why every lag must live in structure and why bracket count matters more than bracket brand — follow the mount maker's spacing for your wind zone, and tighten the spacing near roof edges and corners where uplift concentrates. Exposed sites (ridgelines, lakeshores, open plateaus) justify one bracket size or one attachment count up from the tables. After the first serious blow of the season, walk the array: look for lifted flashing, backed-out fasteners, and any panel that's found a new voice in the wind. A properly attached cabin array rides out weather that removes shingles around it — the failure stories all begin with lags in bare decking.
Frequently Asked Questions
What roof is best for solar panels on a cabin?
Standing-seam metal is the best solar roof made: clamp-on mounts need zero penetrations and the roof outlasts the panels. Corrugated metal and asphalt shingle both work well with the correct brackets and flashing. Shake, tile, and aging roofs argue for a ground mount instead.
Can I install solar panels on a cabin roof myself?
Cabin-scale arrays are a realistic DIY project: the hardware is simple and the skills are careful drilling, sealing, and lag placement into structure. Respect fall protection, work with panels covered or at dusk since sunlit panels are electrically live, and get help lifting anything large.
What angle should cabin solar panels be?
Tilt equal to your latitude is the year-round optimum; add 10–15 degrees if winter performance matters, which also helps shed snow. In practice most cabin owners mount flush to the existing roof pitch and accept a small harvest penalty for a simpler, stronger install.
Do solar panel mounts cause roof leaks?
Properly installed, no — flashed mounts on shingles and EPDM-sealed brackets on metal are proven, durable details. Leaks come from lags that miss rafters, silicone used in place of flashing, and penetrations that were never pilot-drilled. Slow, careful mounting is the whole game.
How much weight do solar panels add to a cabin roof?
Roughly 15–20 pounds per 100W panel including rails — about 2–3 pounds per square foot, well within what sound roof framing handles. The check worth making on old or hand-built cabins is the condition and span of the rafters or purlins, not the panel weight itself.