Off-Grid Cabin Solar: Complete System Setup Guide
Affiliate disclosure: This page contains paid links to Amazon and eBay. If you buy through them, we may earn a commission at no extra cost to you. As an Amazon Associate I earn from qualifying purchases.
An off-grid cabin solar system is one of the few projects where careful assembly matters more than fancy hardware. The same components, installed with short cable runs, correct fusing, and a sane layout, will outperform a pricier system thrown together loosely — and it will do it safely for decades.
This guide is the assembly manual the kits should ship with: how to lay out the system inside the cabin, what order to wire things in (it matters), how to commission the system the first time, and what to watch during the first week. It assumes you've already sized your system — if not, start with the complete cabin solar guide and come back.
System Layout: Where Everything Lives
Before a single wire gets cut, decide where the four component groups will physically live. The golden rule: the battery bank is the center of the system, and everything electrical wants to be close to it.
- Battery bank: indoors or in an insulated enclosure, off the floor, ventilated, away from living space if using lead-acid (which off-gasses). Lithium wants to stay above freezing for charging — an interior closet or under-bench spot is ideal.
- Charge controller: on the wall within a few feet of the batteries. The controller-to-battery run carries high current at low voltage, where every foot of cable costs you.
- Inverter: also within a few feet of the batteries, ventilated, and accessible — you'll use its display and switch regularly. Never in a sealed box; inverters make heat.
- Panels: roof or ground mount with clear southern exposure. The panel run can be long because it operates at higher voltage — this is the run that tolerates distance.
Tools and Materials Beyond the Kit
Even complete kits assume you have basics on hand. Gather these before install day:
- Wire strippers, crimper, and quality lugs/connectors for battery cable
- A multimeter — non-negotiable for commissioning and troubleshooting
- ANL or MRBF fuses with holders for battery-side protection (if the kit didn't include them)
- A battery disconnect switch — one motion to make the whole system safe
- Cable clamps, grommets for wall penetrations, dielectric grease, UV-rated zip ties
- Roof sealant/flashing appropriate to your roofing material for mount penetrations
Wiring Order: The Sequence That Prevents Sparks
Solar systems get wired from the battery outward, with the panels connected last. Controllers need to see battery voltage before panel voltage to configure themselves correctly, and a controller connected to live panels with no battery can be damaged.
- Assemble the battery bank. Torque terminals to spec. If paralleling batteries, use equal-length cables so they share load evenly.
- Install the main fuse and disconnect switch on the battery positive, as close to the terminal as practical.
- Connect the charge controller to the battery. The controller should power up and display battery voltage. Set the battery chemistry profile now — lithium profiles differ meaningfully from AGM.
- Connect the inverter to the battery through its own appropriately-sized fuse. Big inverters draw enormous current; this cable and fuse are the heavyweight items in the whole system.
- Wire DC loads (12V lights, pump, fridge) through a fuse block fed from the battery or controller load terminals.
- Connect the panels last. Cover them or wire at dusk to avoid working live, plug in the array, and watch the controller switch into charging mode.
Panel Mounting and the Array Feed
Mount rails per the manufacturer's spacing, seal every roof penetration with proper flashing or butyl-backed mounts, and orient the array true south at a tilt near your latitude — add tilt if winter performance matters, since a steeper angle also sheds snow. Ground mounts trade a little wire distance for easy snow clearing and adjustability; on wooded sites they often catch more sun than the roof does. Full mounting detail lives in our roof installation guide.
For the feed into the cabin, use UV-rated solar cable, drip loops at penetrations, and a weatherproof gland or junction box where the wires pass through the wall or roof. If your array is more than a couple of panels, wiring them in series raises voltage and shrinks the required cable size — check your controller's maximum input voltage first, and remember cold weather pushes panel voltage up.
Commissioning: First Power-Up Checklist
- With panels still disconnected, verify battery voltage at the controller and inverter terminals matches the battery's actual voltage (multimeter, not trust).
- Confirm the controller's chemistry profile and charging voltages match your battery's datasheet.
- Connect the array. The controller should report incoming watts within seconds in daylight.
- Switch on the inverter with no loads. Check output voltage at an outlet (should read ~120V).
- Add loads one at a time — lights, then fridge, then the biggest appliance — watching the inverter's draw and listening for alarms.
- Label everything: fuses, switches, and cable runs. Future-you, troubleshooting by headlamp in February, will be grateful.
A Proven Full-Time Configuration
For cabins going straight to full-time living, this is the architecture we recommend most: a pre-matched large-format system where array, storage, and inverter-charger were engineered together, rather than scaling up a starter kit piece by piece.
Renogy Complete Off-Grid Cabin Solution
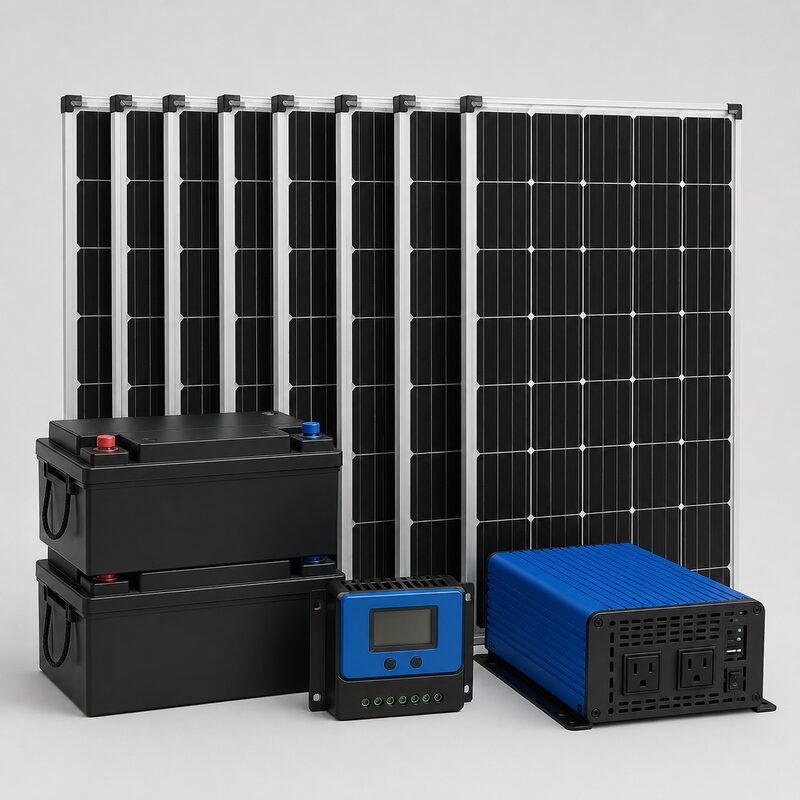
A serious all-in-one package for full-time cabins and workshops — high-efficiency N-type panels, an expandable LiFePO4 battery bank rated at 20.48kWh, and a 3,500W pure sine wave inverter-charger, shipped as one pre-matched kit so nothing gets mismatched.
See Live Price at Renogy →Direct from Renogy — we may earn a commission at no extra cost to you.
An inverter-charger (rather than a plain inverter) matters at this scale: it accepts generator or shore input and charges the bank through the same unit, which makes a winter backup generator a plug-in accessory instead of a wiring project. Pair it with our solar + generator hybrid guide if your winters are serious.
The First Week: What to Watch
A new system tells you almost everything about its long-term health in the first week of real use:
- Morning battery state of charge. If the bank is consistently deeply discharged by sunrise, your storage is undersized for your habits — better to learn that in week one.
- Time to full charge. A healthy system should refill the bank by early-to-mid afternoon on a sunny day, leaving surplus hours for opportunistic loads (laundry, tool charging, water heating).
- Controller behavior at solar noon. Watch peak input watts. Dramatically below array rating on a clear day usually means shading, wiring loss, or an undersized controller clipping the harvest.
- Inverter idle draw. Inverters consume power just being on. If yours idles high, switching it off overnight can recover a meaningful slice of daily capacity.
- Connection temperatures. After an hour of heavy load, feel (carefully) every major connection. Warm lugs mean loose or undersized connections — fix before they become failures.
Maintenance: The Short Honest List
Well-built solar is gloriously low-maintenance. The whole annual list: brush snow and clean pollen/dust off panels a few times a year; re-torque battery and inverter connections annually; scan controller history monthly for anomalies; keep vegetation from shading the array as it grows; and test your disconnects and fuses once a season so you know they work before you need them. Cold-climate cabins should also read the winter solar guide — battery temperature management is the one genuinely seasonal task.
Troubleshooting: The Faults You'll Actually Meet
Ninety percent of off-grid faults are connections, and the multimeter finds them all. The classic symptoms and their usual causes: controller shows zero PV input in sun — a tripped PV breaker, an unseated connector at the array, or panels still covered; check voltage at the controller's PV terminals and walk backward toward the array until it appears. Charging current far below expectations on a clear day — partial shading (walk the array at the problem hour and look for shadows you stopped noticing), a loose series connection dragging the string, or a controller amp limit you've outgrown. Inverter alarms under load — low battery voltage sag from undersized or loose battery cables far more often than a genuinely empty bank; measure voltage at the inverter terminals while the load runs and compare to the battery terminals. A meaningful gap between those two readings is resistance in the cable or lugs, and re-torquing fixes more inverter complaints than any setting.
The bank drains overnight with everything off — it isn't off. Inverter idle draw, a controller's display, a forgotten USB outlet: hunt phantom loads with the shunt monitor or by pulling fuses one at a time. Every off-grid cabin has one forgotten load; finding it is a rite of passage.
Documentation: The Gift to Future You
The day the system works, document it while everything is fresh. A one-page laminated sheet on the power wall should carry: a simple line diagram of the system, every fuse's location and rating, the battery's charge profile settings, the controller and inverter model numbers, and the shutdown/startup order. Add photographs of the controller's settings screens to your phone. Two years from now, when a fault appears at dusk or a guest needs to shut the system down safely, that sheet is worth more than any component in the build. It's also the difference between a solvable warranty call and an archaeology project.
Label physically, too: every fuse holder, every switch, both ends of every cable run. Heat-shrink labels cost pennies during the build and are nearly impossible to retrofit through cable clamps later.
Scaling Up Later: Designing Today for the Bigger System
Three cheap decisions during the first build make the inevitable expansion painless. Run conduit, not bare cable, through wall penetrations — pulling a second, thicker run through existing conduit is a ten-minute job, while a new penetration is an afternoon and a leak risk. Mount the power wall with empty plywood real estate beside the controller; the second controller, bigger fuse block, or future inverter-charger needs somewhere to live. And choose the bank's voltage with the five-year system in mind: rewiring a 12V system to 24V later touches every component, while starting at 24V costs almost nothing extra on day one for any system that might grow past a few hundred watts. The cheapest expansion is the one the first build quietly planned for.
Grounding and Surge Protection, Properly
Grounding is the part of off-grid setup most often skipped and least forgiving when it matters. The system: bond all panel frames and mounting rails together and run a ground conductor to a ground rod — either the cabin's existing electrode or a dedicated eight-foot rod driven near the array. Inside, follow the inverter manual's instructions on neutral-ground bonding precisely; off-grid inverters differ on whether they bond internally, and getting this wrong creates either a shock hazard or nuisance faults. Lightning country adds two cheap components: a DC surge protection device on the controller's PV input and, ideally, an AC SPD at the inverter output. Direct strikes are rare; induced surges from nearby strikes are not, and they hunt the longest wires on the property — which, after your install, are the array runs. The whole grounding bill of materials costs less than any single component it protects.
Living Off-Grid: The First Season's Adjustments
The system changes behavior, and behavior changes the system. Expect a first season of small recalibrations: discovering which loads are cheap (LED everything, laptops, the DC fridge) and which are budget events (anything that heats), learning to glance at the monitor the way you once glanced at a thermostat, and shifting heavy loads into the solar-noon surplus window until it becomes unconscious habit. Most owners report the same arc — a few weeks of over-attention, then a settling into rhythm where the system disappears into the background of cabin life. The one habit worth keeping from the anxious phase: the morning glance at state of charge. It's the single number that tells you whether the system and the lifestyle are still in balance, and it's the earliest warning for every problem worth catching.
The Off-Season Shutdown and Spring Restart
Cabins that sit empty deserve a clean shutdown ritual, and a well-built system makes it a five-minute job: switch off the inverter, isolate the array at its breaker, confirm no phantom loads remain on the DC block, and either leave the controller float-charging a topped-up bank or throw the main disconnect entirely — lithium prefers wintering around half charge if fully disconnected, AGM prefers full. Photograph the controller's season totals on the way out; that snapshot is spring's baseline.
The spring restart reverses the order with one addition: inspect before energizing. Walk the array for winter damage, check cable runs for chew marks and abrasion, sniff and eyeball the battery space, and re-torque the main lugs. Then bank disconnect on, controller awake, array breaker closed, inverter last — the same battery-first discipline as the original commissioning. A system opened and closed this way each season will quietly outlast every estimate in its manuals.
Two Tools That Belong in Every Commissioning Kit
The setup sequence above leans on two pieces of gear worth owning before install day:
Klein Tools Digital Multimeter
The tool every step of commissioning depends on: verifying battery voltage before the controller sees it, confirming 120V at the first outlet, and hunting the voltage sag that explains most inverter complaints. A cabin without a multimeter is troubleshooting by superstition.
Victron SmartShunt 500A Battery Monitor
A shunt-based monitor counts every amp-hour in and out of the bank, turning state of charge from a guess into a number — essential with lithium's flat voltage curve. Install it during the original wiring (it lives on the battery negative) and the first-week checks become a glance at your phone.
Frequently Asked Questions
What order do I connect an off-grid solar system?
Battery first, then charge controller to battery, then inverter to battery, then DC loads, and the solar panels last. Controllers need to detect battery voltage before seeing panel voltage, and connecting panels first can damage some controllers.
Does an off-grid cabin system need to be grounded?
Yes — panel frames and mounting rails should be bonded and grounded, and larger systems should ground the negative bus per the inverter manufacturer's instructions. Grounding protects against lightning-induced surges and fault currents. Local code may specify requirements even for off-grid buildings.
How far can panels be from the battery bank?
Panel runs of 50–100 feet are workable if the array is wired in series to raise voltage, which keeps current and cable size manageable. The controller-to-battery run is the one to keep short — ideally under 6 feet — because it carries high current at low voltage.
Can I install off-grid solar myself?
Most cabin-scale systems are within reach of a careful DIYer using a pre-matched kit: the work is mechanical mounting, correct wire sizing, and disciplined fusing. Whole-home scale systems with high-voltage arrays or split-phase output justify an electrician's review even when self-installed.
Why is my controller showing less wattage than my panels are rated for?
Panel ratings reflect laboratory conditions. Real output runs 70–85% of rating even in full sun due to heat, angle, and wiring losses. Output far below that on a clear day points to shading, a loose connection, an undersized controller, or panels wired in a way that exceeds the controller's limits.
Do I need a backup generator with off-grid solar?
Not necessarily, but most full-time, four-season cabins keep a small one. A generator covers the handful of dark winter stretches that would otherwise require doubling the solar array and battery bank — it's cheaper insurance than oversizing hardware you only need two weeks a year.